(後記:2018/9/22) Gem の使い方のリファレンスを作りました。
Gem 'oekaki' リファレンス
Ruby だけだと遊びで線を引く程度のことも簡単でないので、
Ruby で
GTK+ を使ってシンプルにお絵かきするだけのモジュールを書いてみました。できるのは、点を打つ、線を引く、長方形を描く、円(楕円、弧)を描く、多角形を描く、文字の表示、画像の取得と表示、画像ファイルの読み込みと書き出し、キー入力、マウスクリック、そんなことくらいですか。
Gem 'gtk2' が必要です。
(後注:このモジュールを RubyGem 'oekaki' として公開しました。参照。MyGtk.app の代わりに Oekaki.app とするだけで、あとはすべて同じです。)
円を書いてみます。
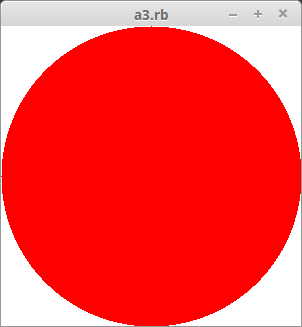
require_relative 'mygtk'
MyGtk.app width: 300, height: 300 do
draw do
white = color(65535, 65535, 65535)
red = color(65535, 0, 0)
rectangle(true, 0, 0, 300, 300, white)
arc(true, 0, 0, 300, 300, 0, 64 * 360, red)
end
end
モジュール 'mygtk' を require_relative しています。下のモジュール 'mygtk.rb' をカレントディレクトリに保存して下さい。以下、require_relative は同じなので書きません。
描画する部分を drawメソッドのブロックに入れます。ウィンドウの大きさの変更などで再描画される際にも呼び出されます。
rectangle は長方形、arc は円を描きます。第一引数の true は中を埋めて描くという意味です。(0, 0, 300, 300) は図形の左上隅の座標と横縦の大きさです。arc の (0, 64 * 360) は円弧の描画を開始する角度と終了する角度で、1°の 64分の1 が単位です。
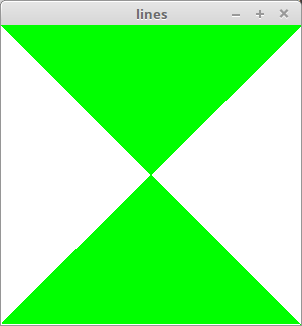
線が移動していくアニメーションです。
MyGtk.app width:300, height: 300, title: :lines do
r = 0
id = Gtk.timeout_add(40) do
color(0, 65535, 0)
line(r, 0, 299 - r, 299)
Gtk.timeout_remove(id) if r >= 300
r += 1
end
draw do
color(65535, 65535, 65535)
rectangle(true, 0, 0, 300, 300)
end
end
Gtk.timeout_add(interval) を直接使ってアニメーションにしています(interval は 1/1000秒単位です)。
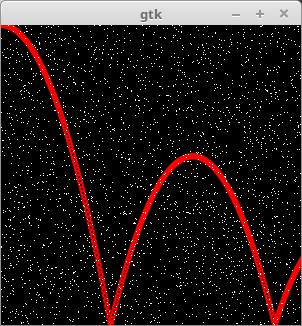
画像ファイルから画像を読み込んで表示し、その上に点の雪を降らせるアニメーションです。エンターキーの入力で終了します(参照)。
MyGtk.app width: 300, height: 300 do
timer(5) do
color(65535, 65535, 65535)
point(rand(300), rand(300))
end
key_in do |w, e|
Gtk.main_quit if e.keyval == Gdk::Keyval::GDK_Return
end
draw do
color(65535, 65535, 65535)
rectangle(true, 0, 0, 300, 300)
img = load_pic("import_codes/cairo_sample2.png")
show_pic(img, 0, 0)
end
end
timer(interval) メソッドは interval の間隔でブロック内を繰り返し呼び出します(内部で Gtk.timeout_add を使っています)。ここでは点の雪を降らせています。
多角形と文字列を表示します。png ファイルとして出力もしています。
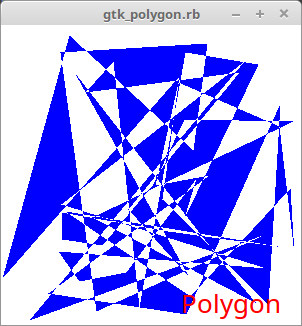
MyGtk.app width:300, height: 300 do
draw do
white = color(65535, 65535, 65535)
red = color(65535, 0, 0)
blue = color(0, 0, 65535)
rectangle(true, 0, 0, 300, 300, white)
ar = []
50.times {ar << [rand(300), rand(300)]}
polygon(true, ar, blue)
text("Polygon", 180, 260, 20 * 1000, red)
img = get_pic(0, 0, 300, 300)
save_pic(img, "sample.png")
end
end
print の 20 * 1000 はフォントの大きさです。指定の意味は GTK+ の仕様そのままです。
最後にモジュール本体のコードを置いておきます。
mygtk.rb
require 'gtk2'
require 'matrix'
include Math

module MyGtk
  W = Gtk::Window.new
  class Tool
    def initialize
      @window = W
      @drawable = W.window
      @gc = Gdk::GC.new(@drawable)
      @colormap = Gdk::Colormap.system
      @color = Gdk::Color.new(0, 0, 0)
      @fontdesc = Pango::FontDescription.new
      @width, @height = 0, 0
    end
    attr_reader :window
    attr_accessor :width, :height

    def color(r, g, b)
      @color = Gdk::Color.new(r, g, b)
      @colormap.alloc_color(@color, false, true)
      @color
    end

    def rectangle(fill, x, y, width, height, color = nil)
      set_color(color)
      @drawable.draw_rectangle(@gc, fill, x, y, width, height)
    end

    def arc(fill, x, y, width, height, d1, d2, color = nil)
      set_color(color)
      @drawable.draw_arc(@gc, fill, x, y, width, height, d1, d2)
    end

    def circle(fill, x, y, r, color = nil)
      arc(fill, x - r, y - r, 2 * r, 2 * r, 0, 64 * 360, color)
    end

    def point(x, y, color = nil)
      set_color(color)
      @drawable.draw_point(@gc, x, y)
    end

    def line(x1, y1, x2, y2, color = nil)
      set_color(color)
      @drawable.draw_lines(@gc, [[x1, y1], [x2, y2]])
    end

    def lines(array, color = nil)
      set_color(color)
      @drawable.draw_lines(@gc, array)
    end

    def polygon(fill, array, color = nil)
      set_color(color)
      @drawable.draw_polygon(@gc, fill, array)
    end

    def text(str, x, y, size, color = nil)
      set_color(color)
      @fontdesc.set_size(size)
      layout = Pango::Layout.new(W.pango_context)
      layout.font_description = @fontdesc
      layout.text = str
      @drawable.draw_layout(@gc, x, y, layout)
    end

    def set_color(color)
      @color = color if color
      @gc.set_foreground(@color)
    end
    private :set_color

    def load_pic(filename)
      GdkPixbuf::Pixbuf.new(file: filename)
    end

    def save_pic(img, filename, type = "png")
      img.save(filename, type)
    end

    def show_pic(img, x, y)
      @drawable.draw_pixbuf(@gc, img, 0, 0, x, y, img.width, img.height,
               Gdk::RGB::DITHER_NONE, 0, 0)
    end

    def get_pic(x, y, width, height)
      GdkPixbuf::Pixbuf.from_drawable(nil, @drawable, x, y, width, height)
    end

    def timer_stop(id)
      Gtk.timeout_remove(id)
    end

    def star(fill, x1, y1, x2, y2, color = nil)
      set_color(color)
      Star.new(fill, x1, y1, x2, y2, @color).draw
    end

    def clear(color = nil)
      color ||= Gdk::Color.new(0, 0, 0)
      set_color(color)
      rectangle(true, 0, 0, @width, @height)
    end

    def get_window_size
      W.size
    end
  end

  class Event < Tool
    def initialize
      super
    end

    def draw(&bk)
      W.signal_connect("expose_event", &bk)
    end

    def timer(interval, &bk)
      Gtk.timeout_add(interval, &bk)
    end

    def key_in(&bk)
      W.signal_connect("key_press_event", &bk)
    end

    def mouse_button(&bk)
      W.add_events(Gdk::Event::BUTTON_PRESS_MASK)
      W.signal_connect("button_press_event", &bk)
    end

    def make_window(&bk)
      w = Gtk::Window.new
      w.instance_eval(&bk)
      w.show_all
      w
    end

    def window_changed(&bk)
      W.signal_connect("configure_event") do
        @width, @height = get_window_size
        yield
      end
    end
  end

  class Star < Tool
    module Add
      refine Vector do
        def to_w(o)
          v = self
          [o[0] + v[0], o[1] - v[1]]
        end
      end
    end
    using Add

    def initialize(fill, x1, y1, x2, y2, color)
      @fill = fill
      @o = []; @a = []; @b = []
      @o[0], @o[1] = x1, y1
      @a[0] = Vector[x2 - x1, y1 - y2]
      θ = PI / 5
      rt1 = Matrix[[cos(θ), -sin(θ)], [sin(θ), cos(θ)]]
      rt2 = rt1 * rt1
      1.upto(4) {|i| @a[i] = rt2 * @a[i - 1]}
      t = cos(2 * θ) / cos(θ)
      @b[0] = rt1 * @a[0] * t
      1.upto(4) {|i| @b[i] = rt2 * @b[i - 1]}
      super()
      @color = color
    end

    def draw_triangle(n)
      ar = [@a[n].to_w(@o), @b[n].to_w(@o), @b[(n - 1) % 5].to_w(@o)]
      polygon(@fill, ar)
    end
    private :draw_triangle

    def draw
      if @fill
        5.times {|i| draw_triangle(i)}
        ar = []
        5.times {|i| ar << @b[i].to_w(@o)}
        polygon(@fill, ar)
      else
        ar = []
        5.times {|i| ar << @a[i].to_w(@o); ar << @b[i].to_w(@o)}
        polygon(@fill, ar)
      end
    end
  end

  class Turtle < Tool
    def initialize
      super
      @pen = Tool.new
      @pen_po = Vector[0, 0]
      @dir = Vector[1, 0]
      @color_t = [65535, 65535, 65535]
      @width, @height = @pen.get_window_size
    end
    attr_accessor :pen_po, :dir

    def left(deg)
      θ = PI * deg / 180
      @dir = Matrix[[cos(θ), -sin(θ)], [sin(θ), cos(θ)]] * @dir
    end

    def right(deg)
      left(-deg)
    end

    def forward(length, draw = true)
      next_po = @pen_po + @dir * length
      if draw
        @pen.color(*@color_t)
        @pen.line(@width / 2 + next_po[0], @height / 2 - next_po[1],
           @width / 2 + @pen_po[0], @height / 2 - @pen_po[1])
      end
      @pen_po = next_po
    end

    def back(length)
      forward(-length, false)
    end

    def color(r, g, b)
      @color_t = [r, g, b]
      @pen.color(*@color_t)
    end

    def circle(radius, fill = false)
      @pen.color(*@color_t)
      @pen.circle(fill, @width / 2 + @pen_po[0], @height / 2 - @pen_po[1], radius)
    end

    def move(x, y)
      @pen_po = Vector[x, y]
    end
  end

  def self.app(width: 300, height: 300, title: "gtk", resizable: false, &bk)
    W.title = title
    W.set_size_request(width, height)
    W.set_resizable(resizable)
    W.set_app_paintable(true)
    W.realize

    e = Event.new
    e.width, e.height = width, height
    e.clear

    e.instance_eval(&bk)

    W.signal_connect("destroy") {Gtk.main_quit}
    W.show_all
    Gtk.main
  end
end

class Gtk::Window
  def button(&bk)
    b = Gtk::Button.new
    b.instance_eval(&bk)
    b
  end
end
注意すべきは、draw や timer などの取るブロックは必ず true を返すようにして下さい。わかりにくいバグを引き起こすことがあります。
※参考
Ruby-GNOME2 Project Website - Ruby-GNOME2 Project Website
