module JankenAsobi
  class Player
    def initialize
      @wincount = 0
    end
    attr_reader :wincount, :name

    def count
      @wincount += 1
    end
  end

  class Cp < Player
    def initialize
      @name = "Computer"
      super
    end

    def show_hand
      rand(3)
    end
  end

  class Man < Player
    def initialize
      print "あなたの名前を入力して下さい:"
      @name = gets.chomp
      @name = "名無し" if !@name or @name.empty?
      super
    end

    def show_hand
      begin
        print "#{@name}の手を入力して下さい(0:グー, 1:チョキ, 2:パー):"
        n = gets.chomp
      end until n == "0" or n == "1" or n == "2"
      n.to_i
    end
  end

  class Judge
    Hand = ["グー", "チョキ", "パー"]

    def initialize(p1, p2)
      @player1 = p1
      @player2 = p2
      puts "#{@player1.name} 対 #{@player2.name} :じゃんけん開始\n "
    end

    def game(n)
      puts "*** #{n}回戦 ***"
      hand1 = @player1.show_hand
      hand2 = @player2.show_hand
      judgement(hand1, hand2)
    end

    def judgement(h1, h2)
      winner = @player1
      print "#{Hand[h1]} 対 #{Hand[h2]}で "
      if h1 == h2
        puts "引き分けです。"
        return
      elsif (h1 - h2) % 3 == 1
        winner = @player2
      end
      puts "#{winner.name}の勝ちです。"
      winner.count
    end
    private :judgement

    def winner
      p1 = @player1.wincount
      p2 = @player2.wincount
      finalwinner = @player1
      print "\n*** 最終結果 ***\n#{p1} 対 #{p2} で "
      if p1 == p2
        puts "引き分けです。"
        return
      elsif p1 < p2
        finalwinner = @player2
      end
      puts "#{finalwinner.name}の勝ちです。"
    end
  end

  def self.play
    player1 = Cp.new
    player2 = Man.new
    judge = Judge.new(player1, player2)
    5.times {|i| judge.game(i + 1)}
    judge.winner
  end
end

JankenAsobi.play
GTK+ で落書き 6(Ruby)
Gem 'oekaki' で落書きです。
oekaki | RubyGems.org | your community gem host
GTK+でお絵かきしてみた(Ruby) - Camera Obscura
スターを描いてみました。
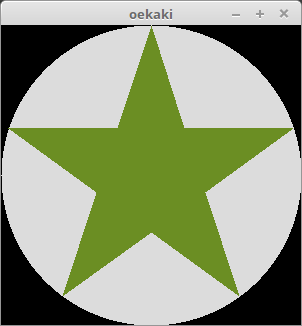
require 'oekaki'

Oekaki.app do
  draw do
    color(0, 0, 0)
    rectangle(true, 0, 0, 300, 300)

    color(0xdc00, 0xdc00, 0xdc00)     #gainsboro
    arc(true, 0, 0, 300, 300, 0, 64 * 360)
    color(0x6b00, 0x8e00, 0x2300)     #olivedrab
    star(true, 150, 150, 150, 0)
  end
end
メソッド Tool#star(fill, x1, y1, x2, y2, color = nil) を新たに書きました。fill は ture で塗りつぶし、false で輪郭のみ描画します。(x1, y1) はスターの中心、(x2, y2) は(とがった)頂点のひとつの座標です。
こんなのも。
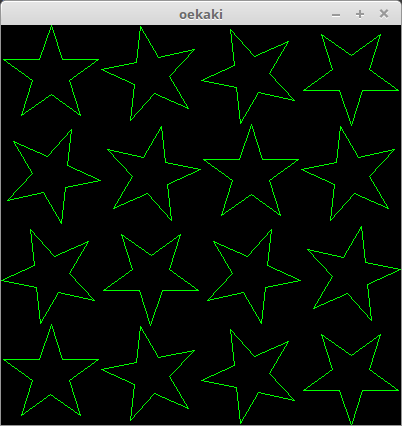
require 'oekaki'

Oekaki.app width: 400, height: 400 do
  draw do
    color(0, 0, 0)
    rectangle(true, 0, 0, 400, 400)

    color(0, 65535, 0)
    po = Vector[0, 50]
    θ = PI / 15
    a = Matrix[[cos(θ), -sin(θ)], [sin(θ), cos(θ)]]
    for y in 0..3
      for x in 0..3
        x1 = x * 100 + 50
        y1 = y * 100 + 50
        star(false, x1, y1, x1 + po[0], y1 - po[1])
        po = a * po
      end
    end
  end
end
Gem の内部で require 'matrix', include Math をしているので、それらのクラスとモジュールがそのまま使えます。
Gem 'oekaki' に加えたコードはだいたいこんな感じです。
require 'matrix'
include Math

module Oekaki
  class Tool
    def star(fill, x1, y1, x2, y2, color = nil)
      set_color(color)
      Star.new(fill, x1, y1, x2, y2, @color).draw
    end
  end

  class Star < Tool
    def initialize(fill, x1, y1, x2, y2, color)
      @fill = fill
      @o = []; @a = []; @b = []
      @o[0], @o[1] = x1, y1
      @a[0] = Vector[x2 - x1, y1 - y2]

      θ = PI / 5
      rt1 = Matrix[[cos(θ), -sin(θ)], [sin(θ), cos(θ)]]
      rt2 = rt1 * rt1
      1.upto(4) {|i| @a[i] = rt2 * @a[i - 1]}

      t = cos(2 * θ) / cos(θ)
      @b[0] = rt1 * @a[0] * t
      1.upto(4) {|i| @b[i] = rt2 * @b[i - 1]}

      super()
      @color = color
    end

    def draw_triangle(n)
      ar = [@a[n].to_w(@o), @b[n].to_w(@o), @b[(n - 1) % 5].to_w(@o)]
      polygon(@fill, ar)
    end
    private :draw_triangle

    def draw
      if @fill
        5.times {|i| draw_triangle(i)}
        ar = []
        5.times {|i| ar << @b[i].to_w(@o)}
        polygon(@fill, ar)
      else
        ar = []
        5.times {|i| ar << @a[i].to_w(@o); ar << @b[i].to_w(@o)}
        polygon(@fill, ar)
      end
    end
  end
end

class Vector
  def to_w(o)
    v = self
    [o[0] + v[0], o[1] - v[1]]
  end
end
スターのそれぞれの頂点は、頂点ベクトルに回転行列(変数 rt2)を順に掛けて求めています。Ruby では標準添付ライブラリの 'matrix' で行列やベクトルの計算が簡単に行なえます。
一番苦心したのがじつは色の取り扱いです。Tool#star メソッドの中で Starクラスのインスタンスを新たに作っているので、Tool#color を Tool#star に対して使うとき、Starクラスは Toolクラスを継承しているものの、Toolクラスのインスタンス変数の内容が Star.new で上書きされてしまいます。なので、少しトリッキーなことをしています。
「Gem 'oekaki'」タグを作りました。
ファイルが画像でなければ削除する(Ruby)
削除すれば true、しなければ false を返します。なお、判断は拡張子で行っているわけではありません。
irb(main):007:0> require './delete_non_img'
=> true
irb(main):008:0> Utils.delete_non_img("img.png")    #削除しない
=> false
irb(main):009:0> Utils.delete_non_img("text")       #削除する
=> true
delete_non_img.rb
require 'fileutils'
require 'utils'

module Utils
  def delete_non_img(fname)
    if Utils.imgexist?(fname)
      false
    else
      FileUtils.rm(fname)
      true
    end
  end
  module_function :delete_non_img
end
モジュール 'utils' は自家製です(参照)。
GTK+ でプログレスバーを簡単に使う(Ruby)
長い処理だと、プログレスバーがあると便利ですよね。GTK+ で簡単に表示できるライブラリを作ってみました。

使い方はこんな感じです。
Utils.progress_bar do |bar|
  for i in 0..20
    bar.fraction = i / 20.0
    bar.text = "#{i * 5}%"
    sleep(0.5)
  end
end
Utils.progress_bar のブロック内に処理を書きます。ブロック変数 bar のインスタンス・メソッド Gtk::ProgressBar#fraction= あるいは Gtk::ProgressBar#set_fraction() がプログレスバーの値を決めるもので、0.0〜1.0 の値を代入して下さい。ウィンドウは自動で消えないので、ウィンドウに付いている消去のマークをクリックして処理が完了します。なお、ウィンドウを強制消去してしまった場合はユーザーの処理も中断してしまうので、注意して下さい。
なお、Gtk::PorgressBar のインスタンス・メソッドはすべて使うことができます(text= なども)。
Ruby コード。
require 'gtk2'

module Utils
  def progress_bar
    w = Gtk::Window.new
    w.signal_connect("destroy") {Gtk.main_quit}
    w.set_size_request(300, 50)
    w.border_width = 10
    w.title = "Progress"

    bar = Gtk::ProgressBar.new
    w.add(bar)

    Thread.new(bar) do |bar|
      yield(bar)
    end

    w.show_all
    Gtk.main
  end
  module_function :progress_bar
end
なお、これは 野良 Gem 'Utils' - Camera Obscura に入れてあります。
GTK+ で落書き 5(Ruby)
Gem 'oekaki' で落書きです。
oekaki | RubyGems.org | your community gem host
GTK+でお絵かきしてみた(Ruby) - Camera Obscura
キャンバス空間と色空間をリニアに連続的変化させて、ドットを描いています。

Ruby コード。
require 'oekaki'
require 'matrix'

L = 400
C_MAX = 65536
C_STEP = 1000

class Field
  def initialize
    @x = rand(L); @y = rand(L)
    n = Vector[rand, rand]
    @n = [n[0] * 2 / n.norm, n[1] * 2 / n.norm]
  end
  attr_reader :x, :y

  def next
    @x, @y = @x + @n[0], @y + @n[1]
    @n[0] = -@n[0] if @x < 2 or @x >= L - 2
    @n[1] = -@n[1] if @y < 2 or @y >= L - 2
  end
end

class Color
  def initialize
    init
  end
  attr_reader :x, :y, :z

  def init
    @x = rand(C_MAX); @y = rand(C_MAX); @z = rand(C_MAX)
    cn = Vector[rand, rand, rand]
    @cn = [cn[0] / cn.norm, cn[1] / cn.norm, cn[2]/ cn.norm]
  end

  def next
    @x, @y, @z = @x + @cn[0] * C_STEP, @y + @cn[1] * C_STEP, @z + @cn[2] * C_STEP
    @cn[0] = -@cn[0] if @x < C_STEP or @x >= C_MAX - C_STEP
    @cn[1] = -@cn[1] if @y < C_STEP or @y >= C_MAX - C_STEP
    @cn[2] = -@cn[2] if @z < C_STEP or @z >= C_MAX - C_STEP
    init if rand < 0.001
  end
end

pos = Field.new
col = Color.new

Oekaki.app width: L, height: L do
  draw do
    color(0, 0, 0)
    rectangle(true, 0, 0, L, L)
  end

  timer(20) do
    color(col.x.to_i, col.y.to_i, col.z.to_i)
    arc(true, pos.x.to_i + 2, pos.y.to_i + 2, 4, 4, 0, 64 * 360)
    pos.next
    col.next
    true
  end
end
だいぶ DRY原則に反したコードですが、お許しを。
ディレクトリのバックアップ-削除あり(Ruby)
Ruby でバックアップ・プログラムを書きました。バックアップ先のフォルダがバックアップ元のフォルダの中身と再帰的に同じ内容になるようにします。なので、バックアップ先にあってバックアップ元の中身にないファイルやフォルダは(バックアップ先で)削除されるので注意して下さい。「削除がされない」バージョンは下のリンク先にあります。
再帰的なファイルのバックアップ(Ruby) - Camera Obscura
なお、機械的なコピーではありません。変更があった部分のみ処理します。基本的に Linux 向けで、Windows ではファイルの日付の考え方が Linux とはちがうので、期待した動作をしません。
使い方はこんな感じです。backup('バックアップ元', 'バックアップ先')
backup('/home/***/Documents', '/media/***/MyHDD/Documents')
backup.rb
require 'fileutils'

def backup(snd, rsv)
  #String{snd, rsv} -> String{r_fn[], s_fn[], s, r}, Time{mts, mtr}
  Dir.chdir(rsv); r_fn = Dir.glob("*")
  Dir.chdir(snd); s_fn = Dir.glob("*")

  r_fn.each do |fname|
    unless s_fn.include?(fname)
      FileUtils.rm_r(File.join(rsv, fname))
      puts "delete: #{fname}"
    end
  end

  s_fn.each do |fname|
    s = File.join(snd, fname)
    r = File.join(rsv, fname)
    mts = File.stat(s).mtime
    mtr = nil
    mtr = File.stat(r).mtime if r_fn.include?(fname)

    if FileTest.directory?(s)
      if r_fn.include?(fname)
	backup(s, r) if mts > mtr and FileTest.directory?(r)
      else
        puts "folder copy: #{fname}"
        FileUtils.cp_r(s, r)
      end
    elsif !r_fn.include?(fname) or mts > mtr
      puts "file copy: #{fname}"
      FileUtils.cp(s, r)
    end
  end
end
任意の階層だけ繰り返しをネストする多重 map 的メソッド(Ruby)
Array#nest_loop で、Integer#times の多重ネスト版です。配列にループ回数を入れて呼び出します。わかり切った多重ループを書くのが面倒なときに役立ちます。ブロックが与えられなければ Enumertor を返します。
[4, 2, 3].nest_loop do |i, j, k|
  print "#{[i, j, k]} "
end
#=>
[0, 0, 0] [0, 0, 1] [0, 0, 2]
[0, 1, 0] [0, 1, 1] [0, 1, 2]
[1, 0, 0] [1, 0, 1] [1, 0, 2]
[1, 1, 0] [1, 1, 1] [1, 1, 2]
[2, 0, 0] [2, 0, 1] [2, 0, 2]
[2, 1, 0] [2, 1, 1] [2, 1, 2]
[3, 0, 0] [3, 0, 1] [3, 0, 2]
[3, 1, 0] [3, 1, 1] [3, 1, 2]
for in 文を使って実装しているので、self の配列の中には範囲演算子や配列、ハッシュなどを使うことができます。また、ブロックのそれぞれの返り値が配列に入って返ります。なので、多重ループ版の map のように使えます。
p [2..6, 2, ["a", "b"]].nest_loop(&:itself)
#=>[[2, 0, "a"], [2, 0, "b"], [2, 1, "a"], [2, 1, "b"], [3, 0, "a"], [3, 0, "b"],
#   [3, 1, "a"], [3, 1, "b"], [4, 0, "a"], [4, 0, "b"], [4, 1, "a"], [4, 1, "b"],
#   [5, 0, "a"], [5, 0, "b"], [5, 1, "a"], [5, 1, "b"], [6, 0, "a"], [6, 0, "b"],
#   [6, 1, "a"], [6, 1, "b"]]

a = [:a, :b, :c]
p [a, a].nest_loop {|i, j| (j == :b) ? [i, "b"] : [i, j]}
#=>[[:a, :a], [:a, "b"], [:a, :c], [:b, :a], [:b, "b"],
#   [:b, :c], [:c, :a], [:c, "b"], [:c, :c]]
本体のコードです。(※注:2018/2/7 に修正しました。)
nest_loop.rb
class Array
  def nest_loop
    check = lambda do |obj|
      return 0...obj if obj.class.ancestors.include?(Integer)
      obj
    end

    e = Enumerator.new do |y|
      ns = lambda do |ax, args|
        a, ax = ax.first, ax.drop(1)
        for i in check.call(a)
          nxt = args + [i]
          if ax.empty?
            y << nxt
          else
            ns.call(ax, nxt)
          end
        end
      end
      ns.call(self, [])
    end
    block_given? ? e.map {|i| yield(i)} : e
  end
end
Gem 化
自家製の utility Gem 'kaki-utils' に同梱しました。
kaki-utils | RubyGems.org | your community gem host
インストールは $ gem install kaki-utils で。使い方は
require 'kaki/utils/nest_loop'

a = [1, 2, 3]
p [a, a].nest_loop {|i, j| i * j}    #=>[1, 2, 3, 2, 4, 6, 3, 6, 9]
という感じ。(2018/2/6)